Homemade Granola Bars

IMG_0671

As I mentioned on Monday, we are prepping for a winter hiking trip, so I’ve been trying to come up with some homemade snacks to bring along.  I wouldn’t want the troops to get hungry on our fun, little adventure.

While the girls busied themselves in the playroom yesterday, crafting all kinds of Valentine goodness, I messed up the kitchen a bit and came up with this granola bar recipe.  We all sampled the granola bars last night for dinner and agreed the test was a success.  Enjoy!

In a large bowl, mix together the following ingredients:

3 cups rolled oats

1 cup whole wheat flour

1 cup unsweetened shredded coconut

1 teaspoon baking soda

3 tablespoons seeds of your choice (I used Garden of Life’s Super Seed, but you could use flax seed, chia seed, etc.)

1/3 cup brown sugar

3/4 cup unsweetened dried bing cherries

3/4 cup unsweetened dried cranberries

Then, in a saucepan over medium heat,  mix together:

2/3 cup honey

1/3 apple sauce

Once the honey and applesauce mixture is combined, remove from the burner and mix in 1 teaspoon vanilla.

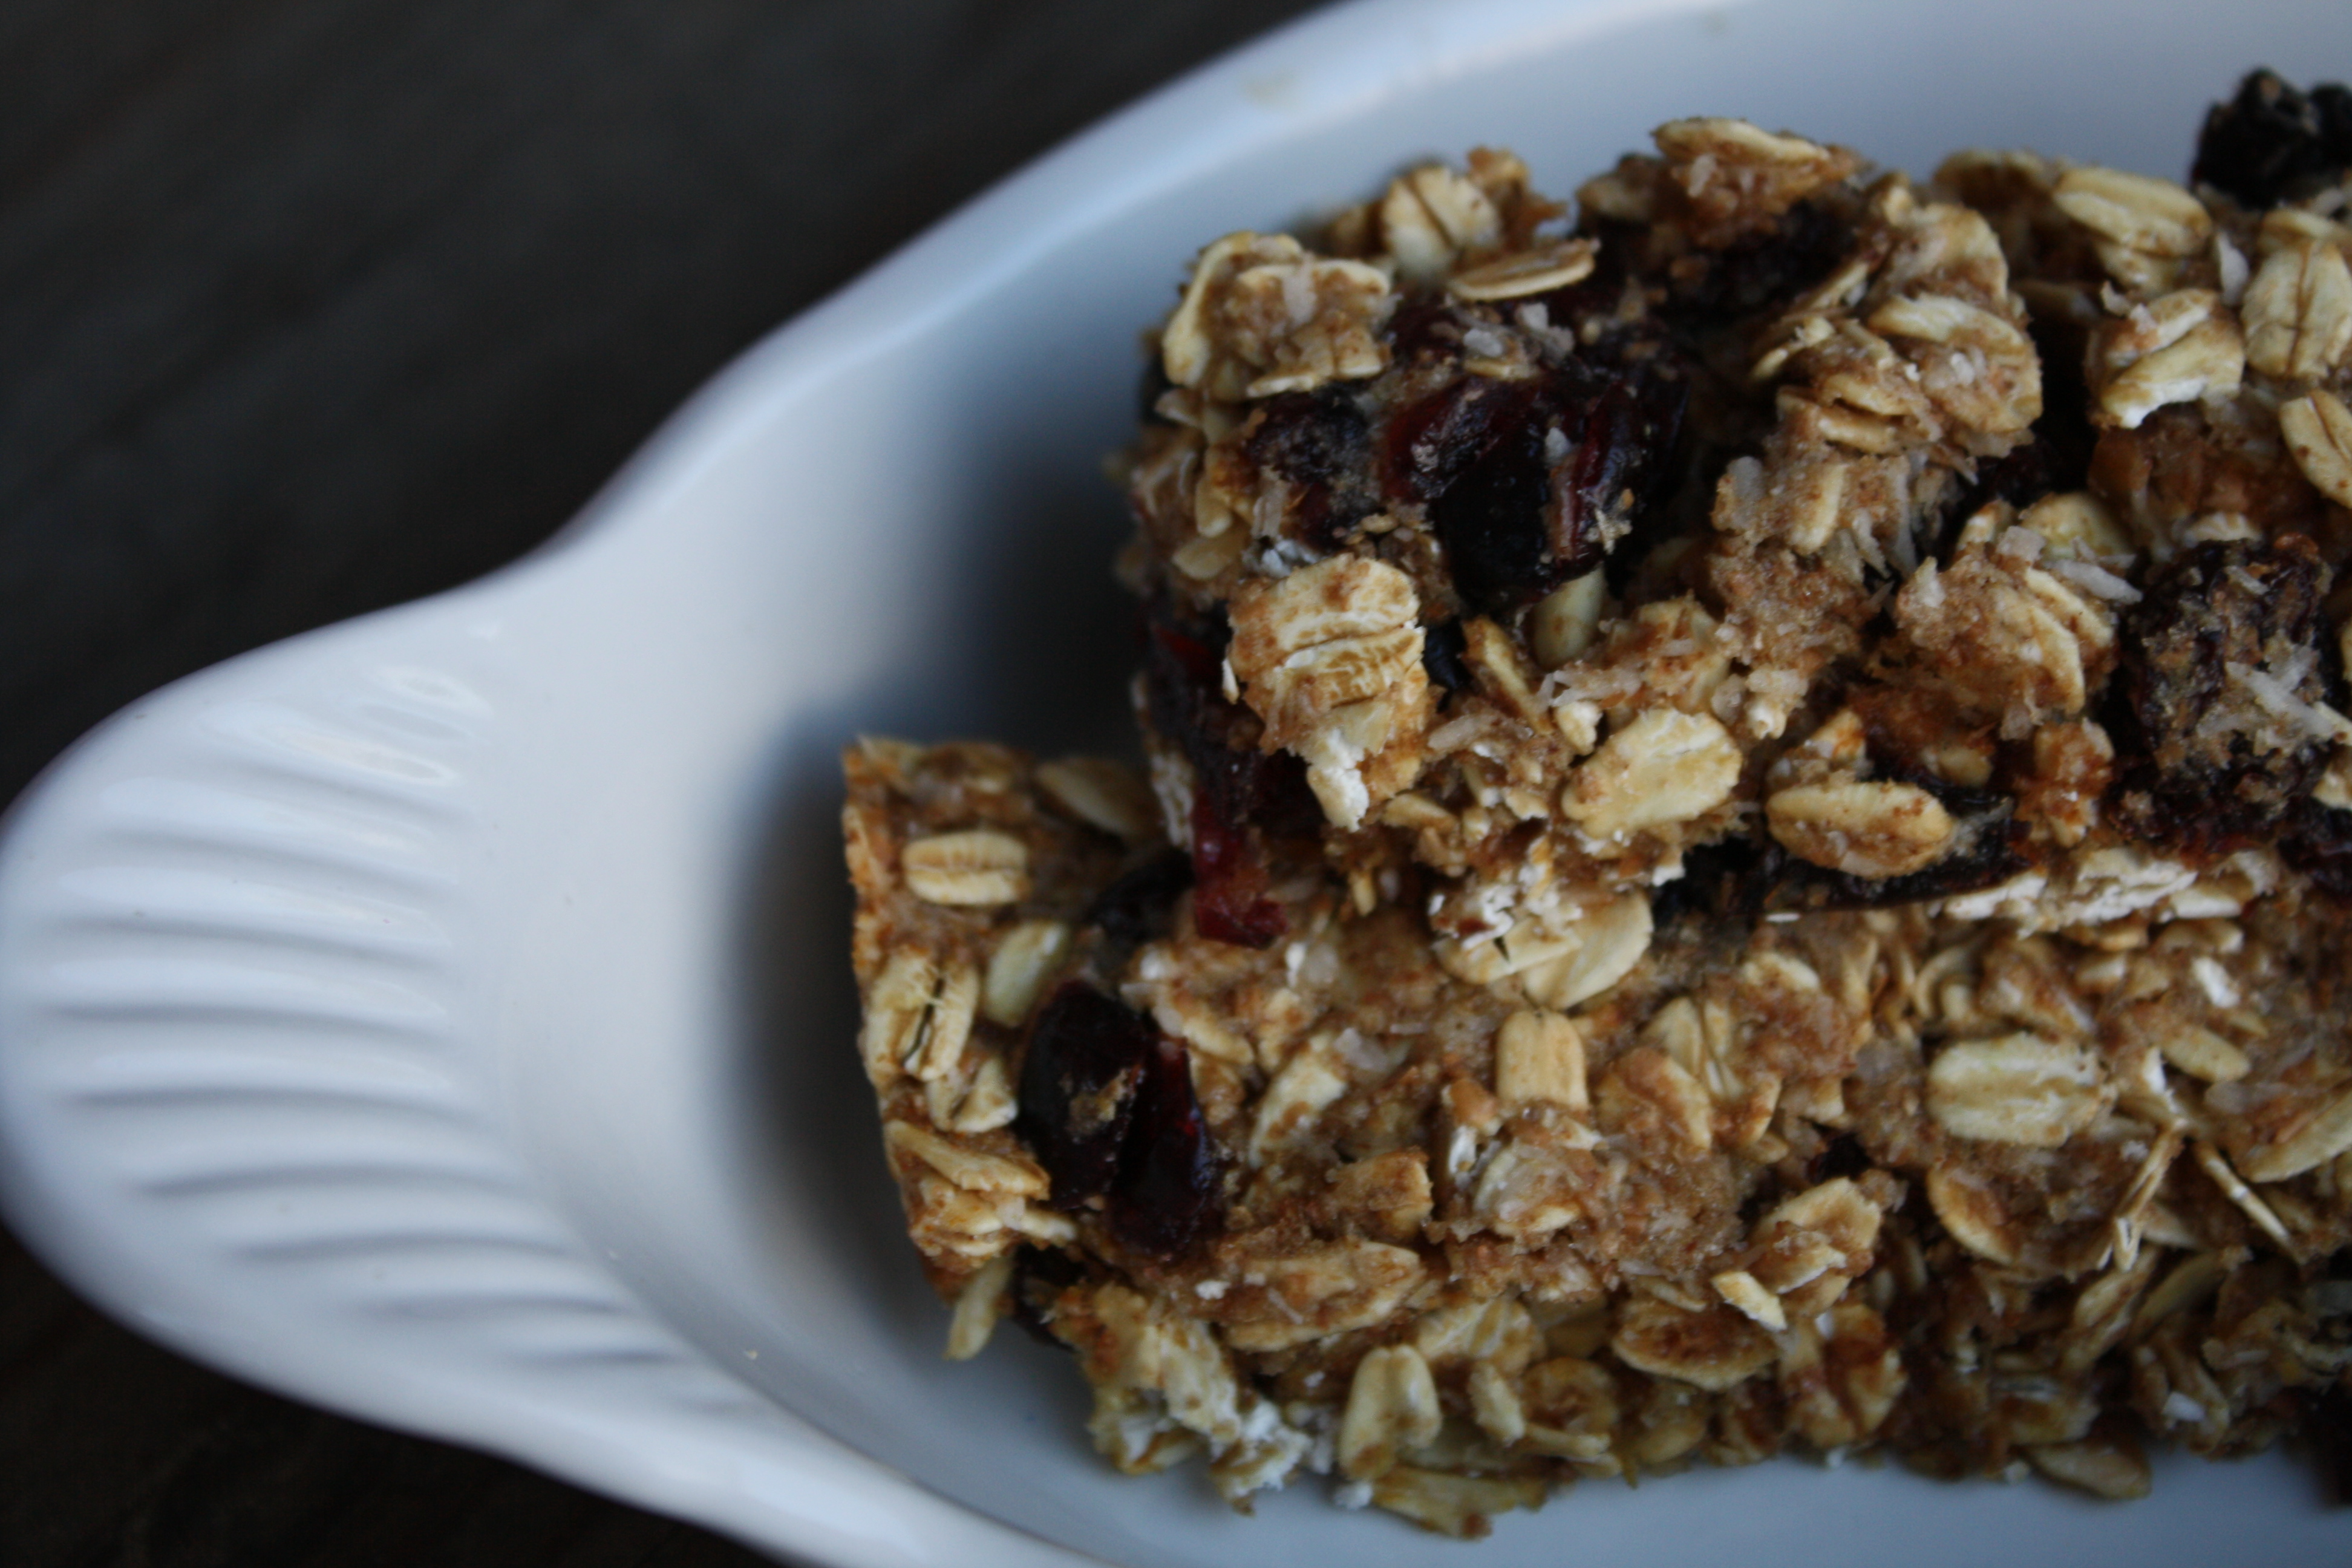
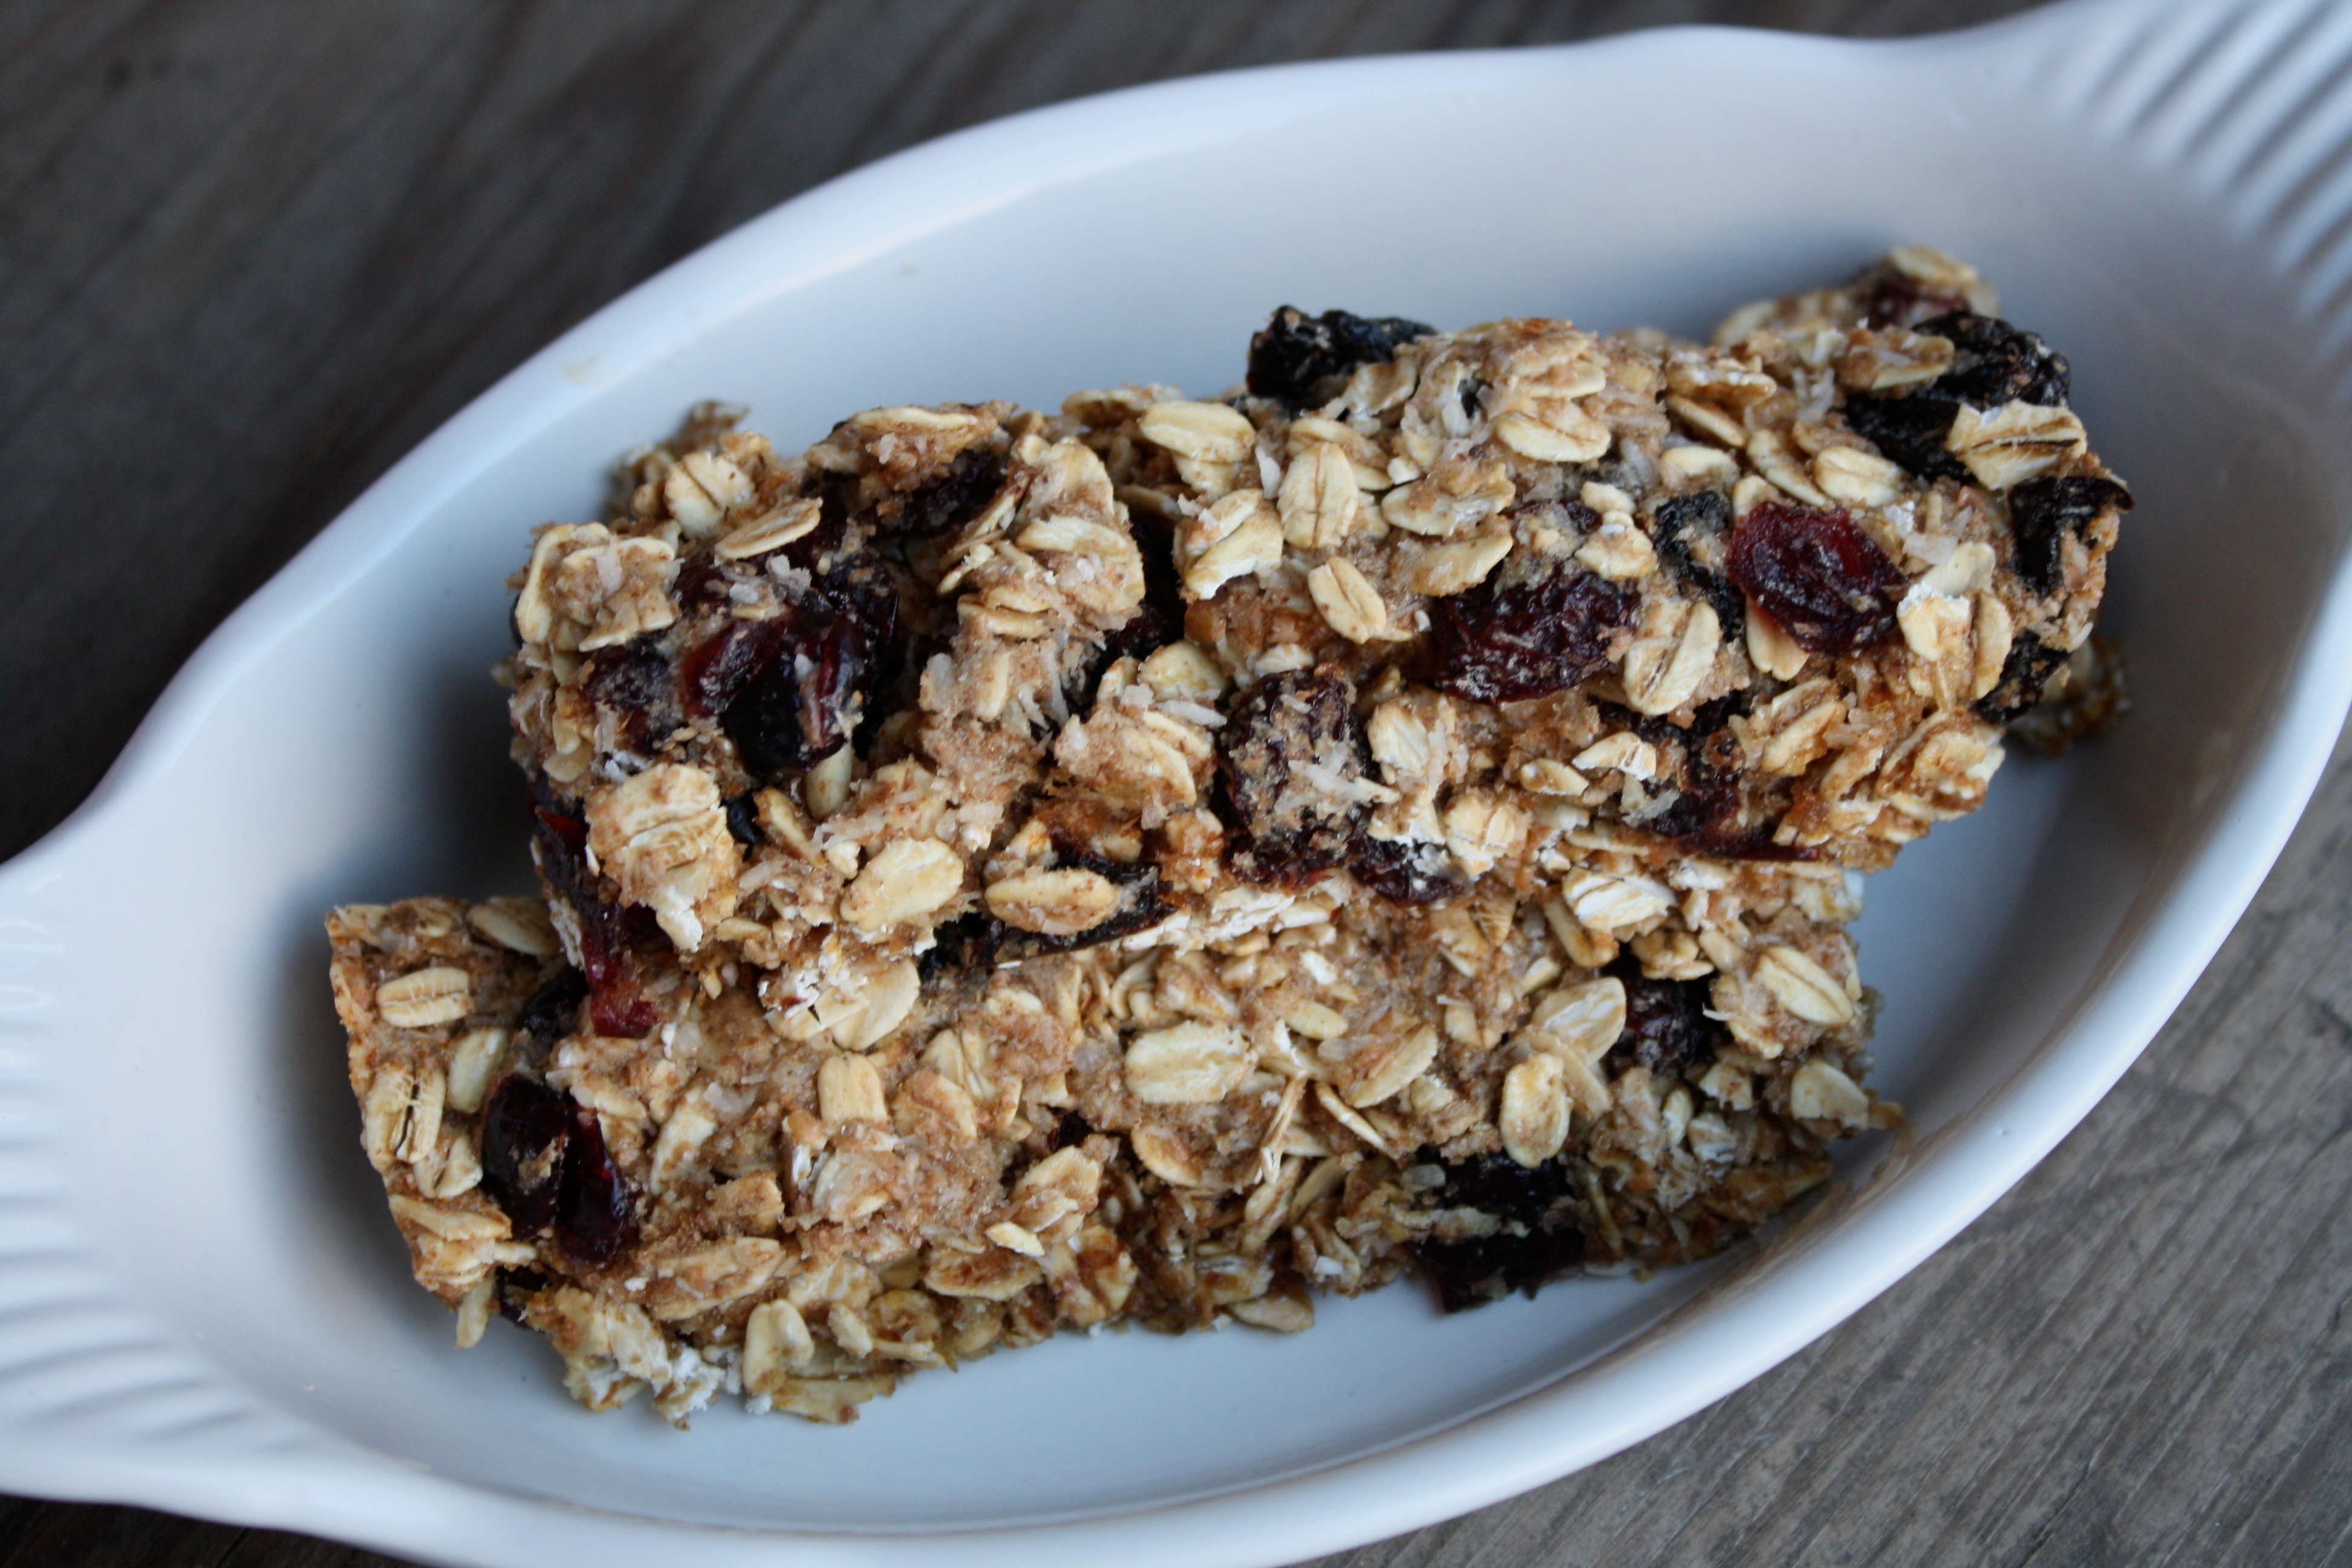
Pour the honey/applesauce/vanilla mixture over the dry ingredients and mix until well incorporated.  Line a 13X9 baking dish with parchment paper.  Pour the mixture into the pan and pat down firmly.  Bake at 325 degrees for 20 minutes.  Allow to cool for at least 20 minutes before removing from the pan.  Cut into bars.  Enjoy!

IMG_0676

*A note about all my recipes:  I use all organic ingredients, local when available.  I use non-homogenized milk, and all of the dairy we use is from animals raised on pasture. I also use oils that are non-GMO verified.  All our meat is raised locally on organic feed, and our beef is grass-fed, grass-finished.  All our spices and cane sugar are fair-trade certified and purchased through a cooperative.

For the Love of Pie

IMG_0515

I am in love.  I am in love with a book…all about pie.  From as far back as I can remember, pies have donned the table of every family gathering.  Whether it was Thanksgiving or Christmas, Easter or Mother’s Day, or even The Fourth of July, pie seemed to take the lead as the star of the dessert show.

My husband has long known of my self-admitted pie obsession, and gave me a fabulous birthday present this year:  A Year of Pies: A Seasonal Tour of Home Baked Pies by one of my fav do-it-yourselfers Ashley English.  After just one flip of the page I knew I was in love.  Oh my.  Each pie looks better than the last, and my girls and I found ourselves nestled on our couch, thumbing through the crisp pages, vowing to make each and every pie in the book by the end of 2013.

IMG_0517

Inspired by the contents of this book, we decided to host an afternoon of pie tasting.  Yes, you heard that correctly.  We spent Monday afternoon, crowded in our warm kitchen with family and friends, eating nothing but pie and drinking mead and coffee.  (I mean, you can’t very well eat a honey pie without honey mead to go with it now can you?)  I think it was the tastiest afternoon I have enjoyed in some time.  Yum.

IMG_0516

Hearty Oatmeal Chocolate Chunk Cookies

IMG_0334

I am constantly testing out recipes in my kitchen, attempting to incorporate local organic ingredients to amp up the healthiness of the goodies we love to eat, while also keeping them super yummy.  I still had some locally-grown rolled oats in my fridge from this farmer and whole wheat flour from this farming family, so I created this recipe to highlight those hearty grains and their lovely earthy, nutty flavors.  Enjoy!

Ingredients:

1/2 cup butter

1/2 cup coconut oil

1 cup brown sugar (packed)

1/2 cup granulated cane sugar

2 eggs

1 teaspoon vanilla

1/2 baking soda

1 cup whole wheat flour

1 cup all-purpose flour

1 1/2 cups rolled oats (not quick oats)

4-6 oz. high quality milk chocolate chopped into chunks (I love using Green & Black’s Organic Chocolate in all my baking.)

Cream the butter, coconut oil, and both sugars using a hand blender or stand mixer.  Then blend in the eggs and the vanilla.  After all of these ingredients have been well incorporated, add the baking soda, followed by both flours.  Now, mixing by hand, add the oats and chocolate.

Scoop the dough out (about 2 tablespoon-size) and bake at 375 degrees for 7-9 minutes, depending on whether you like chewy oatmeal cookies or crunchy ones.

*A note about all my recipes:  I use all organic ingredients, local when available.  I use non-homogenized milk, and all of the dairy we use is from animals raised on pasture. I also use oils that are non-GMO verified.  All our meat is raised locally on organic feed, and our beef is grass-fed, grass-finished.  All our spices and cane sugar are fair-trade certified and purchased through a cooperative.

Venison Chorizo

IMG_0446

My hubby has been out there in the wee hours of the morning, waiting patiently for a deer to meander his way for a long time now.  Eight years if we are counting.  But who is really?  Well, after all this time, it finally happened.  We have fresh venison!  And I must say it is a festival of all things venison around here these days….venison stew, venison burgers, venison meatloaf…and as of yesterday, venison chorizo.  Yum.

IMG_0458

The whole family got involved yesterday afternoon, as the temperature around here plummeted into the single digits and we were forced indoors.  We used our absolutely favorite chorizo recipe from Rick Bayless’ Mexico One Plate at a Time, substituting the pork shoulder the recipe calls for, with venison.

IMG_0453

We purchased this meat grinder yesterday, to assist with the process, and once we got going and figured out how the machine actually worked, we were well on our way to a delicious dinner.

IMG_0470

And to my absolute astonishment, after we finished making the chorizo, each gal gobbled up a bunch of mini chorizo burgers they had hand-crafted themselves!

Yam Fries With Spiced Aioli

IMG_0309

With winter now in full swing, I am trying to get seasonal ingredients on the table as much as I can.  This week I tried out a new experiment with fresh yams I found at the store.  This recipe made for a nice sweet and salty treat that the kids just gobbled right up.  Enjoy!

Ingredients:

1 egg yolk

1 tablespoon Dijon mustard

3/4 cup canola oil, plus additional oil for frying

1 cup olive oil

1/2 teaspoon salt

pinch of pepper

1/4 teaspoon nutmeg, plus more for garnish

4 large yams

For the aioli:  Whisk the egg yolk with the Dijon mustard.  Very slowly, drop by drop, add the canola oil while whisking briskly.  The mixture should start to thicken.  Once all of the canola oil has been added, then very slowly, add the olive oil.  Continue to whisk while adding the olive oil.  The key is to add the oils very, very slowly while whisking continuously.  (This may take some time to master.  If the oil breaks, don’t get frustrated, it happens.  You could try again, or like I’ve done many a time, just eat it anyway 🙂  It still tastes pretty yummy, it’s just not the greatest consistency.)  Once both oils have been added, mix in the salt, pepper and nutmeg.  Pour into a bowl and garnish the aioli with a pinch of nutmeg.

For the yams:  Slice your yams into small strips.  Pour about one inch of canola oil in a pan and heat it.  (A trick is to sprinkle a drop of water in the oil once the oil has been heating for a while.  If the water sizzles when you add it, you know the oil is hot enough.)  Add a handful of the yams to the hot oil and allow to fry for 3-5 minutes.  Remove from the oil and allow to rest on a plate covered with a paper towel to drain off the excess oil.  Salt to taste.  Serve with the aioli.

IMG_0311

*A note about all my recipes:  I use all organic ingredients, local when available.  I use non-homogenized milk, and all of the dairy we use is from animals raised on pasture. I also use oils that are non-GMO verified.  All our meat is raised locally on organic feed, and our beef is grass-fed, grass-finished.  All our spices and cane sugar are fair-trade certified and purchased through a cooperative.

The Gift of Homemade

The season of gift-giving is upon us, and this year we have decided to take a different approach to our most-loved holiday.  We hope to create many of our gifts with our very own hands, thus giving our friends and family something truly from deep within our hearts.  Here is a bit of what is in the works right now…

Late Fall Planting

The week of Thanksgiving, we abandoned the warmth of our kitchen to do a bit of gardening.  We recently acquired asparagus and rhubarb crowns, and wanted to get them into the ground before the first major freeze of the season.  So, we took advantage of a seasonably warm afternoon, stepped into our gardening shoes, and dug our fingers into the cool, damp soil.

First on the docket was to sort through our worms from our compost.  The girls and Tyler picked out each individual wormy (as the girls like to call them), and placed them into a fresh compost bin that would be moved inside for the winter.  Then the amazing, black gold was used in the trenches that would house the asparagus roots.

The girls then helped me to separate the asparagus roots, which we concluded look just like how we imagine aliens to look, and placed them deep beneath the surface of the soil.  We did the same with the rhubarb crowns, burying them underneath the black earth in hopes they will produce delicious spring vegetation in a few months.

Our Weekend

This past weekend we opted to stay close to home because many of us in our little household of four were getting over the lovely beginning-of-the-school-year sniffles. It always seems so odd to me to have a cold in the middle of a ninety degree heat wave, yet that was our particular situation this weekend.  So with lemon tea and honey in hand, we set to having a fun-filled weekend none the less.

The first pumpkins of the season made an appearance at Friday’s market, so we had to buy just a couple.  The girls worked hard all of Saturday morning, digging out the seeds and preparing for some roasted goodness.

While the girls worked hard on the pumpkins, I got busy making my homemade granola. We were able to purchase some delicious home-grown oats from Hazard Free Farms, which helped to make the granola extra yummy.

I also tried another treasure from Grandpa Dit’s recipe box: piccalilli.  I must say, standing in the kitchen over a giant pot of boiling veggies on a ninety-seven degree day was not one of my brightest ideas, but the final result was quite tasty.

And I chopped the day away, getting food ready to put by in the freezer for the winter months.  Andrea Hazzard, from Hazzard Free Farm, gave us a great suggestion for preserving watermelon.  Pour boiling water over a bit of honey, making honey water.  After cooling down the honey water, pour it over diced watermelon until all watermelon is covered.  Then freeze it for enjoyment in the winter months.

Rajah enjoyed finding a new hiding spot.  Oh my.

And Tyler enjoyed some brewing time.  He concocted a batch of caramel creme ale.  Yummy.

I have also been hard at work in the backyard, continuing with our garden expansion.  I am so excited to bring you the finished product in tomorrow’s post.  Hooray!  See you then.

Once A Year

One of my favorite times of the year has arrived, and that my friends is peach time!  I love fresh peaches so much in fact that I only eat them when they are in season, in their absolute prime, in the middle of the August heat.

We buy our peaches locally from a family fruit farm where they grow all of their own peaches in their orchard, and they are to die for.  After the market last week, we ran home and got to work on my favorite pie on earth:  Grandma Dit’s Peach Pie.

I still remember being in about forth grade and I was home sick from school because I was running a high fever.   It was late fall, the time when most schoolchildren begin to fall ill, and I found myself buried beneath the afghan on the couch, watching reruns of Saved By The Bell.  My mom asked me if there was anything she could get me to eat that would make me feel any better.  I told her the only thing that would heal what was ailing me was Grandma’s peach pie.  There were no fresh peaches available in late fall in Rockford, Illinois, so my mom did what any good mother would do.  She improvised.  She went to the grocery store and bought a pre-made peach pie.  I took one bite, spit it out and said, “This is not right.  It’s not the same.  Never mind.”

I don’t know why this story has stuck with me for so long, but I think it is because there is no replacement for real, in-season peach pie, using my grandmother’s recipe.  So here goes…

I make my own crust (recipe found here).  Then I fill it with delicious sliced peaches.

I add about 10 tiny dollops of butter on top of the peaches, and then create a mixture of 1 cup sugar, 4 tablespoons flour and 1 teaspoon cinnamon.  I scoop this mixture over the peaches and butter so the entire pie is coated.  I then add just a touch (about 1/4 cup) of water to the pie.  This creates a delicious custard-like consistency.  Bake at 400 degrees for 15 minutes and then reduce the heat to 325 degrees for 45 minutes.

I truly hope you enjoy this recipe that I hold so close to my heart.  Enjoy!

Everything But The Kitchen Sink

As I mentioned yesterday, our garden is quiet the producing machine right now.  The girls and I were in the garden all day yesterday and came out with bucket upon bucket filled with onions, tomatoes, cucumbers, greens, and carrots.

This time of garden abundance reminded me of my favorite summertime dish to make:  gazpacho.  (Gazpacho is a tomato-based soup traditionally served cold.)  You can literally throw in anything and everything you have fresh in your garden, give it a whirl in your food processor and you have a healthy, flavorful dish.  It’s a great way to ensure you are getting all of your veggies in, and it tastes wonderful too.  In our house we like to serve the gazpacho in glasses and drink it like a smoothie, but you could serve it in bowls and eat it with a spoon if you prefer it that way.

In the particular batch I made yesterday, I used:  tomatoes, green and purple sweet peppers, banana peppers, garlic, red onion and cilantro.  I then add salt, pepper and Sriracha (our kitchen could not survive without this stuff) to taste.